Step 1: Gather Your Supplies
Before you start, make sure you have all the necessary supplies. Here’s a checklist to get you started:
- Paint (primer, color coats)
- Paintbrushes (angled brush for cutting in, small brush for touch-ups)
- Rollers and roller covers (with appropriate nap for your wall texture)
- Paint trays and liners
- Painter’s tape
- Drop cloths or plastic sheeting
- Sandpaper (medium and fine grit)
- Spackling compound and putty knife
- Screwdriver (to remove outlet covers and switch plates)
- Ladder or step stool
- Clean rags and a bucket of water
Step 2: Prepare the Room
Proper preparation is crucial for a professional finish. Follow these steps to prepare your room:
- Clear the Room: Remove as much furniture and decor as possible. Move large pieces to the center of the room and cover them with drop cloths or plastic sheeting. Remove any wall hangings, outlet covers, and switch plates.
- Clean the Walls: Dust and dirt can prevent paint from adhering properly. Clean the walls with a damp sponge or cloth. For greasy or heavily soiled areas, use a mild detergent solution. Allow the walls to dry completely before proceeding.
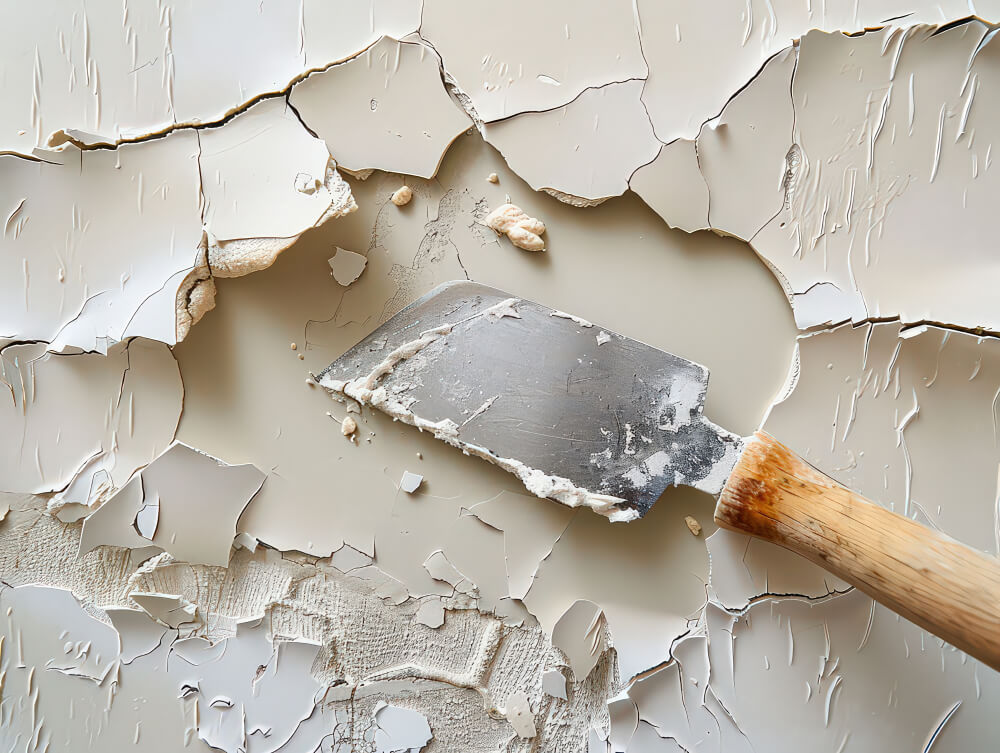
- Repair Any Damage: Inspect the walls for any cracks, holes, or dents. Use spackling compound and a putty knife to fill in any imperfections. Once the spackling has dried, sand the repaired areas until they are smooth and flush with the surrounding wall.
- Sand the Walls: Lightly sand the entire wall surface to create a smooth, even base for the paint. This step is especially important if you are painting over a glossy finish. Wipe away any dust with a clean, damp cloth.
Join HICP Homeowner’s Alliance
Connect with experts, get special discounts and enjoy member benefits
Step 3: Protect Your Surfaces
To achieve clean, professional-looking edges, take the time to properly protect your surfaces:
- Apply Painter’s Tape: Use painter’s tape to mask off areas you don’t want to paint, such as baseboards, window trim, and door frames. Press the tape down firmly to prevent paint from seeping underneath.
- Cover the Floor: Lay down drop cloths or plastic sheeting to protect your floors from paint drips and splatters. Secure the edges with painter’s tape to keep them in place.
Step 4: Prime the Walls
Priming is an essential step that helps the paint adhere better and provides a uniform base for your color coat. Choose a primer that is appropriate for your wall surface and the type of paint you plan to use.
- Apply the Primer: Use a roller to apply a thin, even coat of primer to the walls. Start at the top and work your way down, using long, smooth strokes. Use an angled brush to cut in around edges and corners. Allow the primer to dry completely according to the manufacturer’s instructions.
Step 5: Paint the Walls
Now that your room is prepped and primed, it’s time to apply the paint. Follow these steps for a professional finish:
- Cut In: Using an angled brush, cut in around the edges of the room. This includes the ceiling line, corners, and around trim. Take your time and use long, smooth strokes to create clean, sharp lines.
- Roll the Paint: Pour the paint into a tray and load your roller. Start in the corner of the room and work in small sections. Use a “W” or “M” pattern to apply the paint evenly, then fill in the gaps with vertical strokes. This helps distribute the paint more evenly and prevents roller marks.
- Blend the Edges: To avoid visible lines between the cut-in areas and the rolled areas, blend the edges while the paint is still wet. Lightly roll over the cut-in areas with a clean, dry roller to smooth out any lines.
- Apply Additional Coats: Depending on the color and type of paint, you may need to apply multiple coats for full coverage. Allow each coat to dry completely before applying the next. Follow the manufacturer’s recommendations for drying times.
Step 6: Clean Up
Once you’ve achieved the desired coverage and the paint is dry, it’s time to clean up:
- Remove Painter’s Tape: Carefully peel off the painter’s tape while the paint is still slightly tacky. This helps prevent the paint from peeling off with the tape. If the paint has already dried, use a utility knife to score along the edge of the tape before removing it.
- Replace Outlet Covers and Switch Plates: Once the paint is fully dry, reinstall the outlet covers and switch plates.
- Clean Your Tools: Clean your brushes, rollers, and trays with warm, soapy water. Properly store or dispose of any remaining paint according to local regulations.
Tips for a Professional Finish
- Use Quality Tools: Invest in high-quality brushes, rollers, and painter’s tape. They may cost a bit more, but they will produce better results and make the job easier.
- Work in Natural Light: If possible, paint during the day when natural light is available. This helps you see the true color and any imperfections more clearly.
- Take Your Time: Rushing through the painting process can lead to mistakes and a less-than-professional finish. Take your time and be patient.
By following these steps, you can achieve a professional-quality paint job that will enhance the beauty and value of your home. Happy painting!