Benefits of Building Your Own Deck
Before diving into the construction process, let’s explore the benefits of adding a deck to your home:
- Enhanced Outdoor Living: A deck creates an inviting outdoor space for dining, lounging, and entertaining.
- Increased Home Value: A well-built deck can increase your property’s value and appeal to potential buyers.
- Customization: Building your own deck allows you to design it to fit your specific needs and style.
- Cost Savings: DIY deck building can be more cost-effective than hiring professionals.
- Satisfaction: Completing a deck project yourself can provide a great sense of accomplishment.
Tools and Materials Needed
To build a deck, you’ll need the following tools and materials:
- Pressure-treated lumber or composite decking
- Decking screws or nails
- Concrete mix
- Gravel
- Post hole digger or auger
- Level
- Tape measure
- String and stakes
- Circular saw or miter saw
- Power drill
- Hammer
- Safety gear (gloves, safety glasses, ear protection)
- Paint or stain (optional)
Join HICP Homeowner’s Alliance
Connect with experts, get special discounts and enjoy member benefits
Step-by-Step Guide to Building Your Own Deck
Step 1: Plan and Design
- Determine the Size and Location: Decide on the size and location of your deck. Consider factors such as sun exposure, privacy, and access to the house.
- Check Local Building Codes: Check local building codes and obtain any necessary permits. These regulations will specify requirements for deck construction, including the height, spacing of posts, and railing requirements.
- Design the Deck: Create a detailed plan or drawing of your deck, including the layout, dimensions, and any special features like stairs, railings, or built-in seating.
Step 2: Prepare the Site
- Mark the Layout: Use stakes and string to mark the perimeter of your deck. Ensure the layout is square by measuring diagonally between corners.
- Excavate the Area: Remove any grass, vegetation, or debris from the deck area. Dig down about 6-8 inches to create a level base.
Step 3: Install the Footings
- Dig Post Holes: Use a post hole digger or auger to dig holes for the deck posts. The depth and spacing of the holes will depend on your local building codes and the size of your deck.
- Add Gravel: Pour a few inches of gravel into the bottom of each hole for drainage.
- Set Posts in Concrete: Place a post in each hole, ensuring it is level and plumb. Mix the concrete according to the manufacturer’s instructions and pour it into the holes around the posts. Allow the concrete to set for at least 24 hours.
Step 4: Build the Frame
- Install the Ledger Board: Attach a ledger board to the house to support one side of the deck. Ensure the ledger board is level and securely fastened to the house framing.
- Install the Beams: Attach beams to the posts using post-to-beam connectors. Use a level to ensure the beams are even.
- Install the Joists: Attach joists to the ledger board and the beams using joist hangers. Space the joists according to your deck plan and local building codes. Ensure the joists are level and evenly spaced.
Step 5: Install the Decking
- Lay the Decking: Start laying the decking boards perpendicular to the joists, beginning at the house and working outward. Leave a small gap between each board to allow for expansion and drainage.
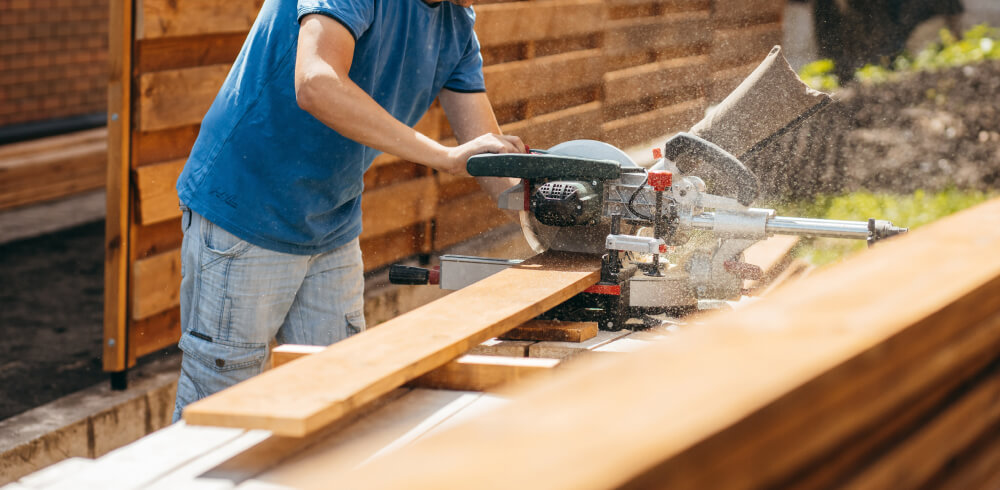
- Cut the Decking: Use a circular saw or miter saw to cut the decking boards to the appropriate length. Ensure the cuts are straight and clean.
- Secure the Decking: Attach the decking boards to the joists using decking screws or nails. Ensure the screws or nails are evenly spaced and flush with the surface of the boards.
Step 6: Install the Railings and Stairs
- Install the Railings: Attach railing posts to the deck frame using bolts or screws. Install the top and bottom rails, and then attach the balusters or spindles. Ensure the railings meet local building code requirements for height and spacing.
- Build the Stairs: Measure and cut stringers for the stairs. Attach the stringers to the deck frame and the ground. Install treads and risers, ensuring they are level and secure.
Step 7: Finishing Touches
- Sand the Deck: Sand any rough spots or sharp edges on the decking and railings to ensure a smooth finish.
- Apply Paint or Stain: Apply paint or stain to the deck to protect the wood and enhance its appearance. Follow the manufacturer’s instructions for application and drying times.
- Inspect the Deck: Walk along the deck to check for any loose screws or nails, and ensure all components are securely fastened.
Tips for a Successful Deck Build
- Use Quality Materials: Invest in high-quality lumber and hardware to ensure a durable and long-lasting deck.
- Work in Sections: Building the deck in sections can help maintain accuracy and make the project more manageable.
- Check for Level: Regularly check that posts, beams, and decking are level to ensure a straight and even deck.
- Allow Concrete to Set: Give the concrete ample time to set before attaching the frame and decking to ensure the posts are secure.
- Follow Manufacturer’s Instructions: Always follow the manufacturer’s instructions for any products used in the construction.
When to Seek Professional Help
While building a deck is a manageable DIY project for many homeowners, there are times when professional help is necessary:
- Large Projects: If you are planning a large or complex deck, a professional can ensure accurate measurements and a high-quality finish.
- Difficult Terrain: If your property has uneven terrain or obstacles, a professional can navigate these challenges and ensure a level deck.
- Limited Tools or Experience: If you lack the necessary tools or experience, hiring a professional can save time and ensure a sturdy, professional-looking deck.
By following this comprehensive guide, you can successfully build a beautiful and functional deck, enhancing your outdoor space and creating a welcoming area for relaxation and entertainment. Proper planning, quality materials, and attention to detail ensure a long-lasting and beautiful deck. Enjoy the satisfaction of a job well done and the benefits of your new outdoor oasis. Happy building!


